
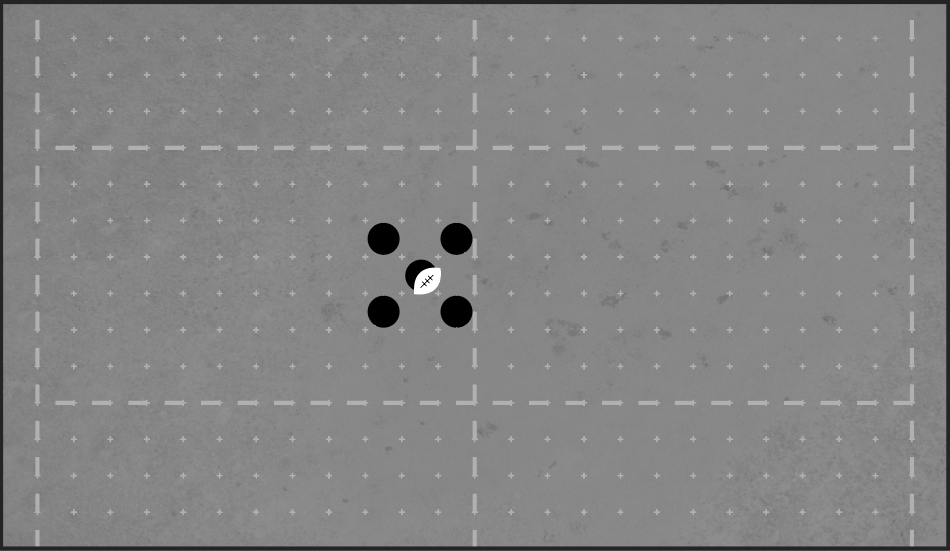
Here we are again discussing the eternal dilemma between ball security and freedom of movement! A cage is a simplistic compromise between the two, and it requires no less than five players confined in a 3 x 3 space. Hell, that is almost half of your team! Crazy, no? Bluntly, this is why it is not the best approach to reach the end zone. It also explains why the more a coach masters the cage and the more he prefers to run the ball. Nevertheless, to run, you must first learn to walk… in a cage.
Make no mistake, you must coach a very dissuasive and physical team to cage effectively. Part of the caging concept is that if your opponent puts a lot of pressure on it, you will not move forward, but you will extract a heavy toll! That is why Orcs with their Block skills, Strength 4 and additional strength skills create strong cages, and why Elves, or even rookie Chaos Chosen, largely prefer to run the ball.
Here, we will discuss the three main methods to move a cage forward. The one to choose depends on the game situation and the team you are facing.
BYPASSING THE DEFENSE
Your team is the fastest but not the strongest? Bypassing the defense is the way to go. Much of a coach’s success comes from his abilities to exploit his team’s advantages over the opponent’s weaknesses. Logically, it is very difficult to push through a stronger team than yours and as a result, you should use your speed to move around it.
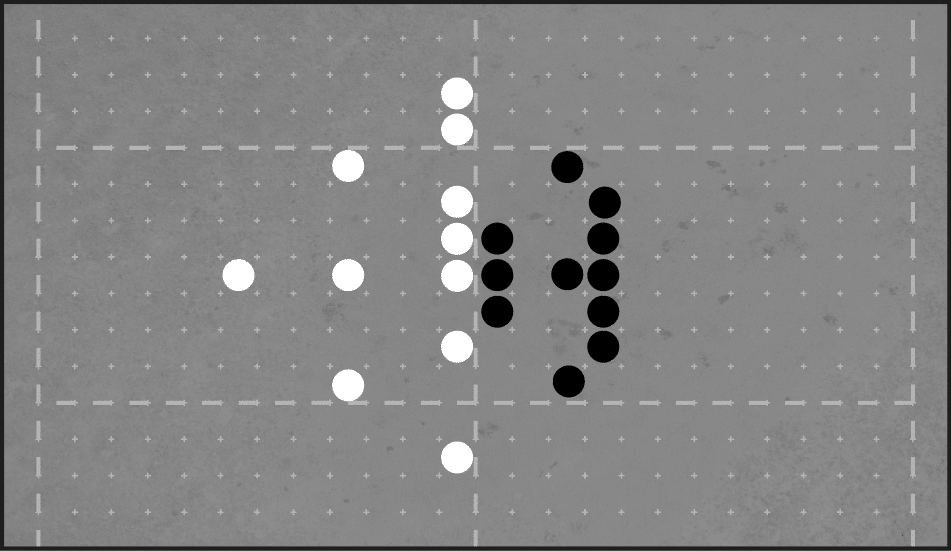
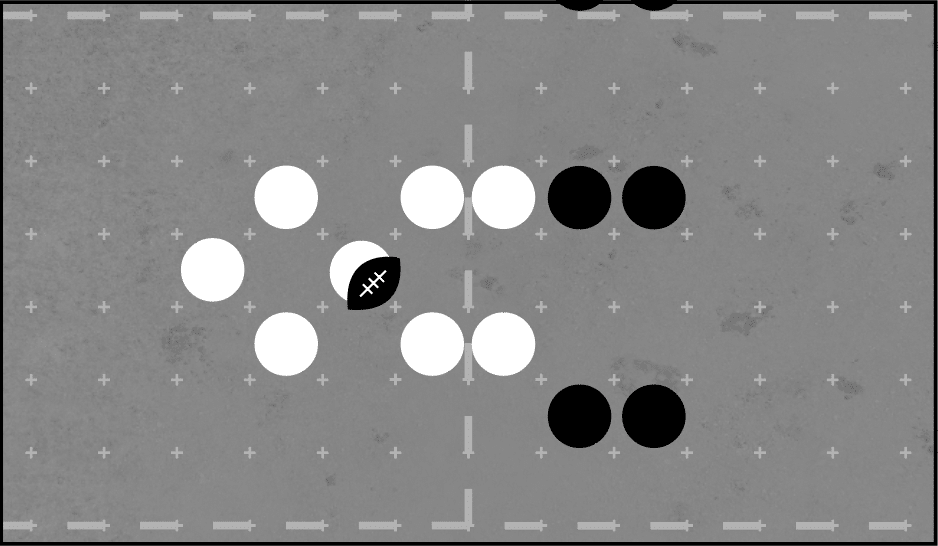
When your team is the fastest on the pitch, set up a wide offensive (diagram A). Then, your players leading the line must work to envelop the opposite team while the other end of the line fluidly follows the movement (Diagram B). Of course, your cage will be vulnerable and likely under constant pressure. It is expected since you are not the strongest. As a rule of thumb, if your players are not made of elven stuff, caging against a stronger team is difficult and mostly unwise as you will have difficulties dodging your players to recreate your cage on the move.
If your opponent valiantly resists, destabilize him. To do so, develop a credible threat on a wing that he will have to shut down to maintain his defensive integrity. Then, consolidate at the center when he compromises himself. Continue your forced march to the other wing, using your speed advantage to distance his defense (diagram C). While doing so, take great care not to get bottled up on a wing. Instead, use other players than your ball carrier to develop your threat. Do not worry, achieving the right balance between eagerly pushing at the risk of being bottled up, and not being convincing enough at the risk of seeing your threat ignored will come with practice.
Bypassing is of very little use against a columns defense. But then, let’s bet that you are the strongest team at the party! This brings us to the next method…
GOING THROUGH THE DEFENSE
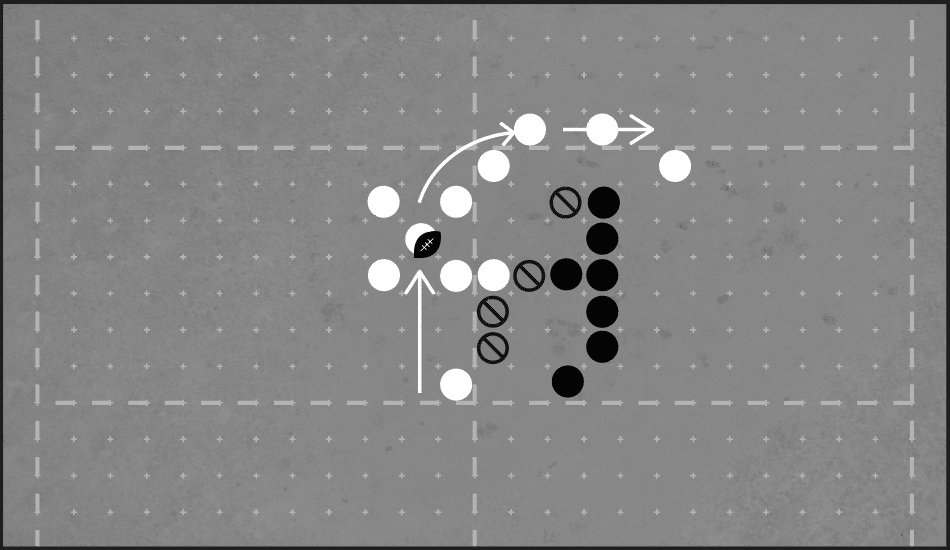
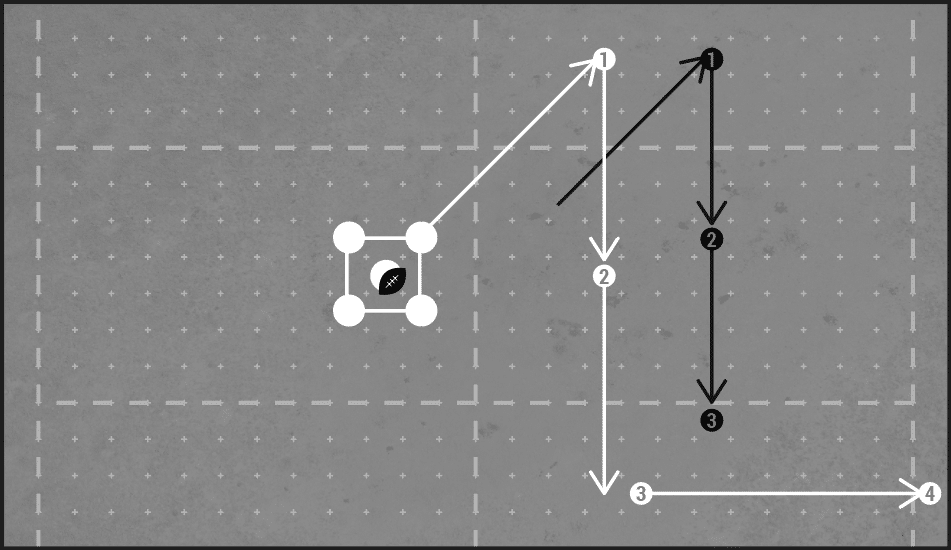
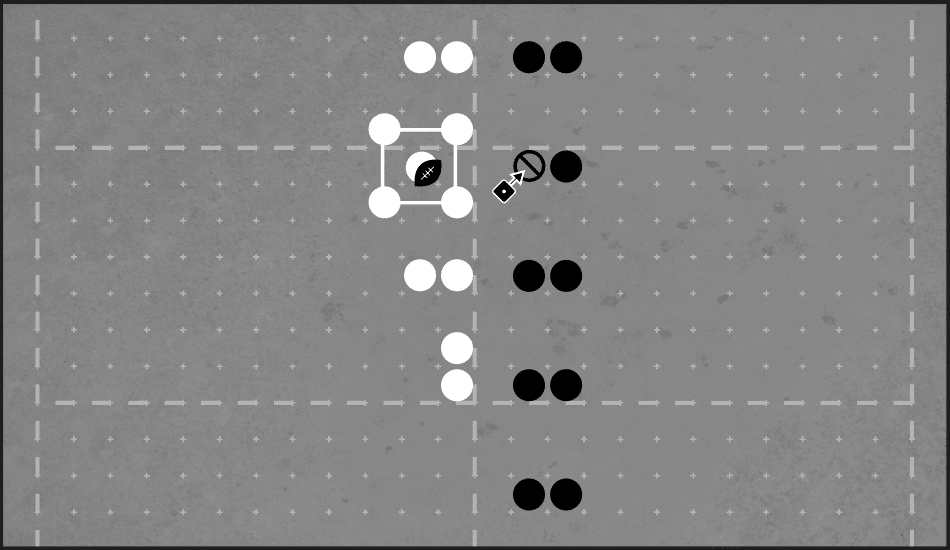
If you are coaching the strongest team on the pitch you will probably have to go through the defense. Or, more explicitly, you will have to flex your muscles and (wisely) beat the cr*p out of those elves until they let you through. For legendary coaches, it is an art that requires tremendous attention to detail! To achieve success, the players in front of your cage must attempt to dislocate the defense. Doing so, take great care to choose an angle of attack not covered by Stand Firm or Side Step nuisances.
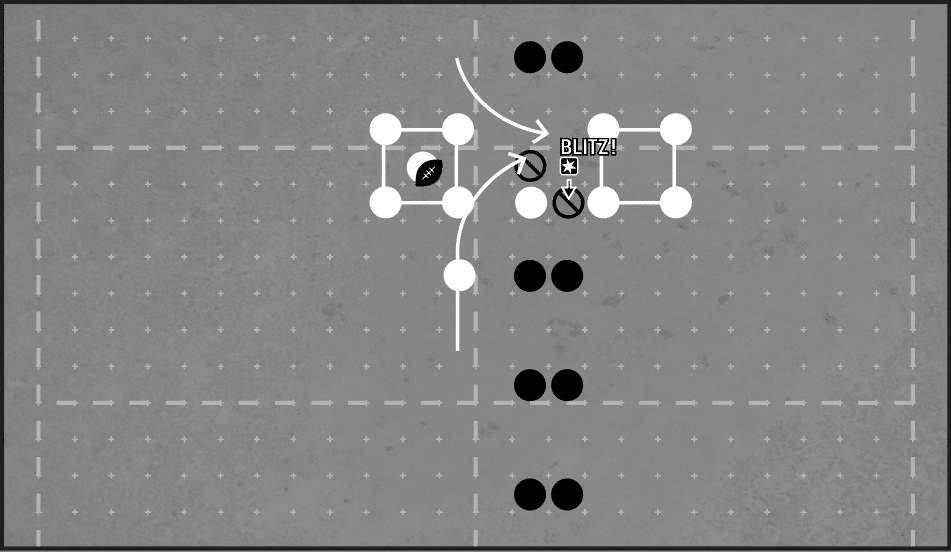
Your goal is to dissuade your opponent from peacefully grazing in front of your cage. To instill fear and create space, your spearhead players should roll as many block dice and armors as possible. Be efficiently ruthless. Once space is created, blitz forward to gain some more ground. Finally, the cage moves in to fill the void created (diagrams E and F). Be careful not to let your players isolated or you will lose effectiveness. This kind of collective offensive effort requires that every single player works towards that single goal!
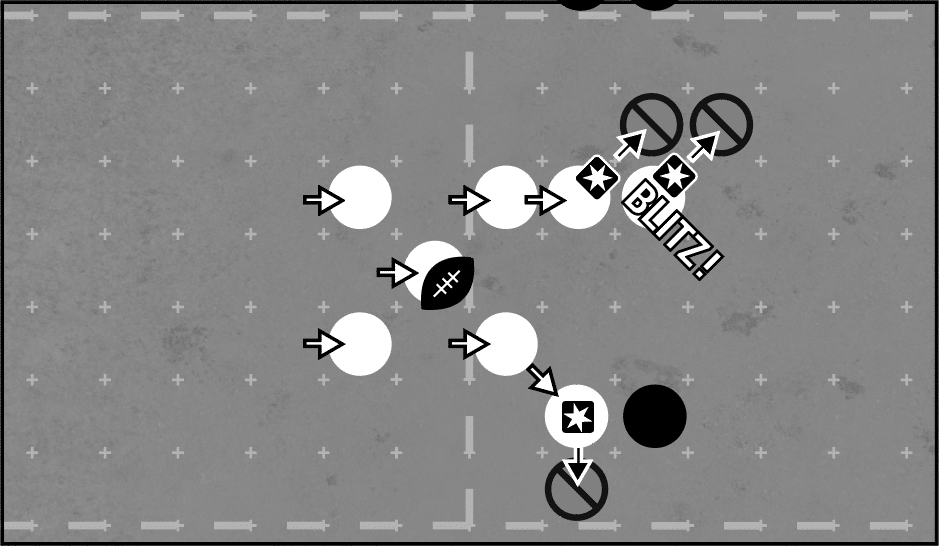
Typically, your opponent will answer one of these two ways. Either he will defend heavily in front of your cage, or he will harass a flank of your vertical formation. Smile if he harasses the back because your situation probably improved as the fewer players in front of your cage the better. If he is equipped to efficiently defend the front with abundant skills such as Stand Firm and Side Step, consider bypassing his defensive using the first method while heavily (but wisely) tagging his most annoying players to hinder their mobility.
If he is pressing on your flanks, move from a vertical to a horizontal cage (diagram F). Then, continue to blitz forward while screening to prevent new flank attacks (diagram G).
Also, patience! Remember that the biggest mistake you can make is to move your cage forward at all costs. When the tempo allows, a game turn spent securely rolling Block dice and Armors may result in a useful numerical advantage. Moving your cage forward will then be easier.
TWO CAGES OFFENSE
Your opponent deployed a colorful tackle zones curtain that would make your auntie proud? Sure, it is vexing, but not insurmountable. First, relentlessly spend your blitzes on targets that may pay off. Ideally, roll two or three block dice with the Mighty Blow skill on skill-less targets sporting an armor of 7 or less. Even better if they have a niggling injury. Blitz players with the Dodge skill only if you have the Tackle skill. Avoid Wrestle-happy halfwits. If you repeat these blitzes often enough, chances are you will eliminate tackle zones. Meanwhile, wisely tag opponents with your players that are not on cage duty. Use your strength advantage to handcuff a maximum of skill-less players, compelling them to attempt a dodge not covered by a skill reroll.
Foul a player in the middle of a cage when relevant, especially if his armor is lowered to 5 or less. As a bonus, a stunned player sometimes usefully occupies a square which temporarily frees a player for you to deploy elsewhere.
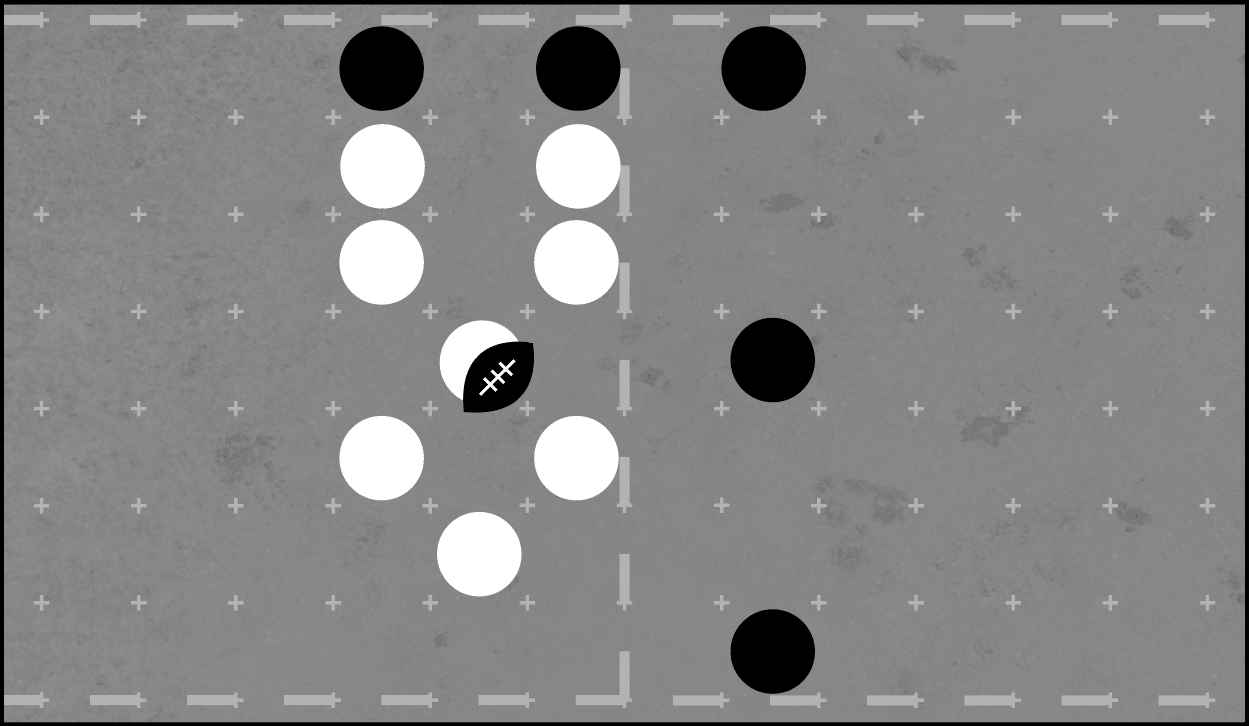
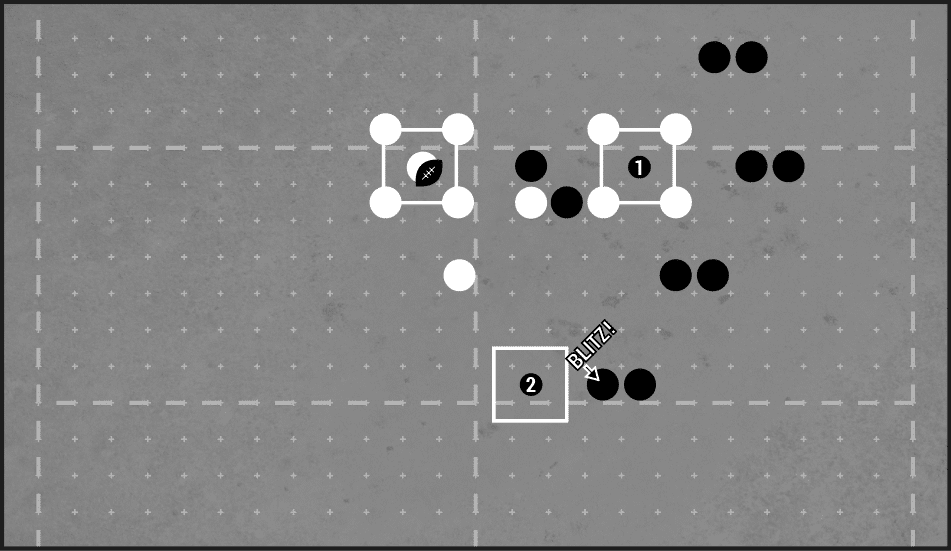
Then, patience. The defensive will eventually fail something of significance, especially if you are carefully positioning your Guard and Tackle players. Take advantage of this moment of weakness to organize a second cage further in the opposite half. Here you go! Now your opponent must defend against two cages!
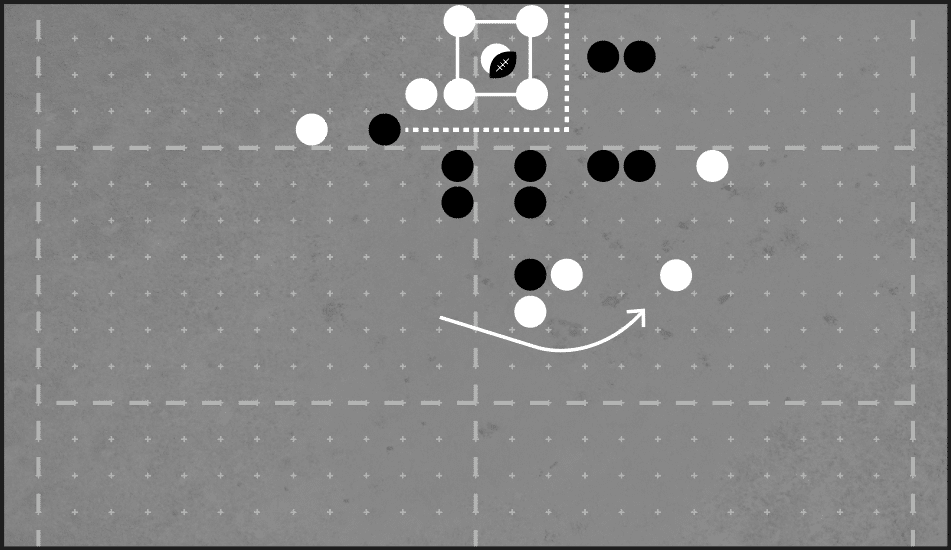
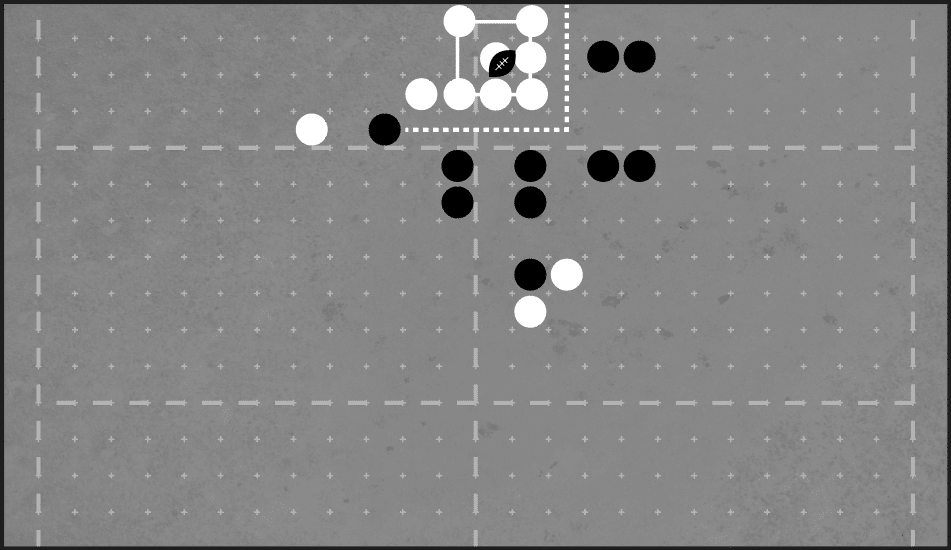
In a two-cage offense, a ball carrier can drop some – or all – of his immediate cover to run into a new cage (diagram H). After this, if the opportunity allows, the abandoned covering players prepare a new cage for the following game turn. Repeat this modus operandi as long as it floats your boat – or as long as your opponent lets it float!
UNSTUCK AN IMMOBILIZED CAGE
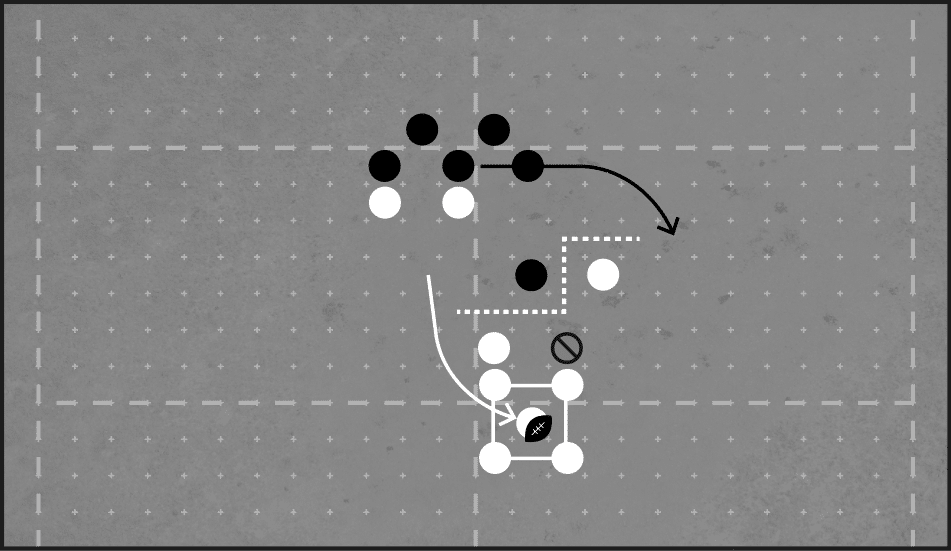
You played poorly and your cage is now immobilized. Even worse, it is bottled near the sideline! Of course, you should rather coach as not to end up in this ugly situation. If your opponent knows what he is doing, you will have a hard time coaching your *ss out of trouble. Anyway, it is better to have a bad plan than none, and here are some avenues to explore.
One solution is to move players behind the line of defense with the idea of opening a small hole to sneak in the ball carrier (diagram I). It is often useless to attempt to squeeze an entire cage in a hole because it requires a hearty mix of go for its and dodges. Remember that three players are often enough to cover a ball carrier and that even a pair of players can form a half-cage along the sideline (but while doing so, beware of Leap or Stunty players that could easily push your ball carrier into the crowd).

If you have a few agility players on your roster, another mistake is not to multiply your tactical possibilities. It is wise to create additional threats so that your opponent does not only have to worry about your cage. In short, complicate his life. For example, moving an agility 3 or better player in a scoring range can create some space to breathe for your ball carrier (diagram J). If you move more than one credible threat in scoring range, leave two squares between them to force your opponent to send more players to cover them.
Whatever you choose to do, do not sacrifice your positioning for the sole purpose of strengthening a cage. Does integrating a 6th or 7th player in your cage is the best use of resources (diagram K)? Sometimes, but far more often, you will miss their tackle zones to apply screens or help hurt players elsewhere. When so many resources are confined in a 3 x 3 space, you leave the control of the pitch to your opponent… and it helps his defensive effort.
Lastly, remember the wise words of many cage-loving coaches: « There is no hurry before the 8th game turn of the half »
[give_form id=”12090″]
FURTHER READING
- How to Stop an Offensive, by Taureau Amiral
- Granting a Touchdown to Win, by Taureau Amiral
- What to Do Against a Strong Team, by Taureau Amiral